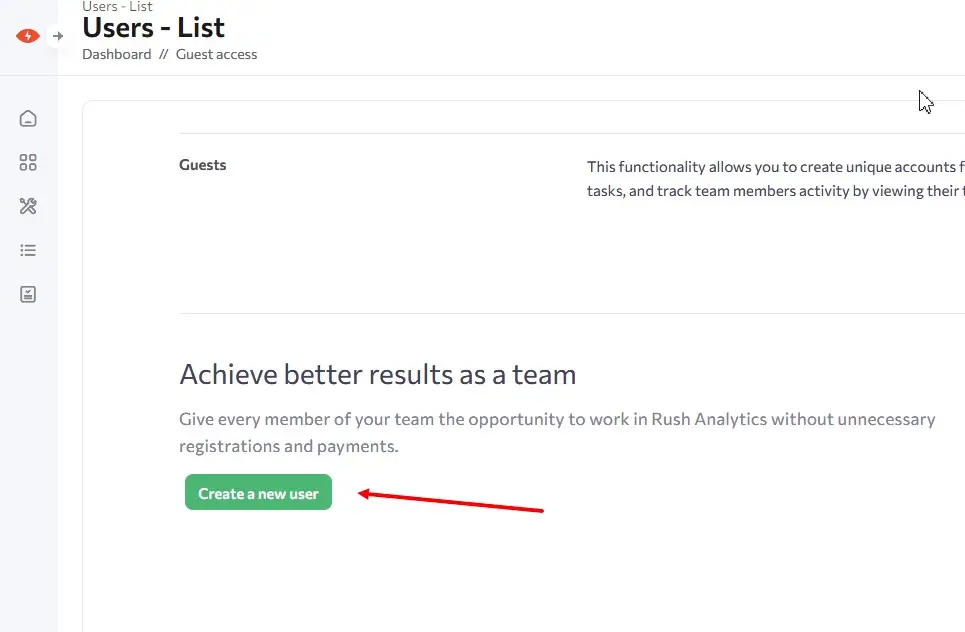
This functionality allows you to create unique accounts for each member of your team, for maximum operational efficiency and security. You will be able to share your tasks among your employees, grant access to specific tools or tasks, and track team members’ activity by viewing their tasks and budgeting your plan limits. This functionality also allows you to grant guests access to specific tasks or tools with a “view” option.
Adding a new user
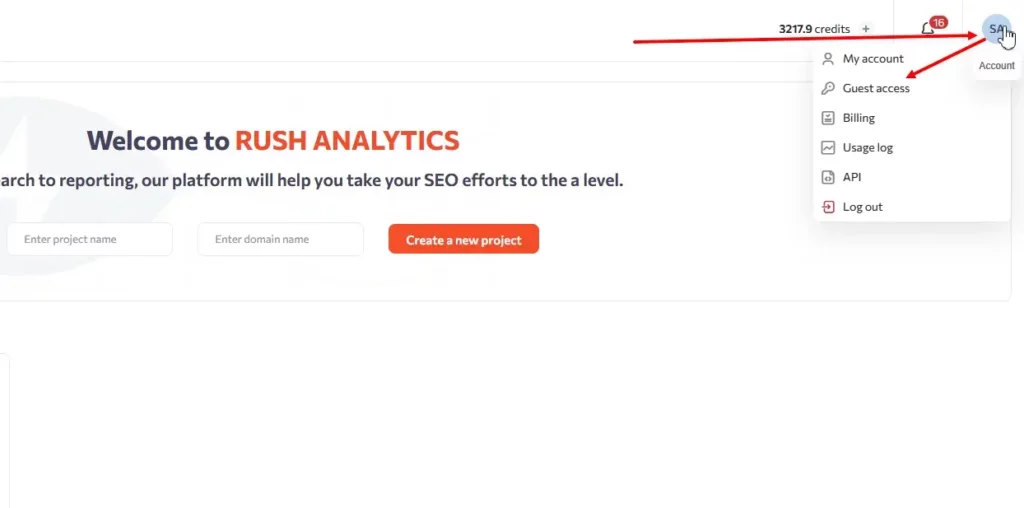
To add a new user, go to the Users page by selecting “Guest access” in the top menu of the website.
Once you have done this, click on the “Create user” button.
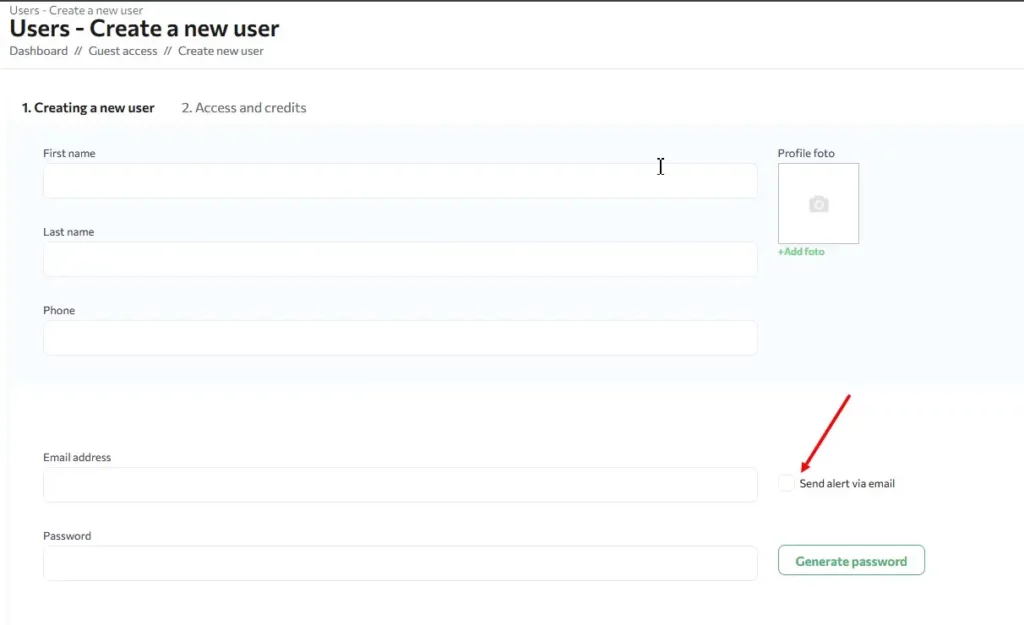
Step 1
The first step in creating a user is to specify:
First name
Last name
Phone
E-mail address
Password
Notification settings
Allowed IPs
You can also send an email notification to the user when the account is created. To do this, you must tick the box next to the email address field.
Step 2
User type
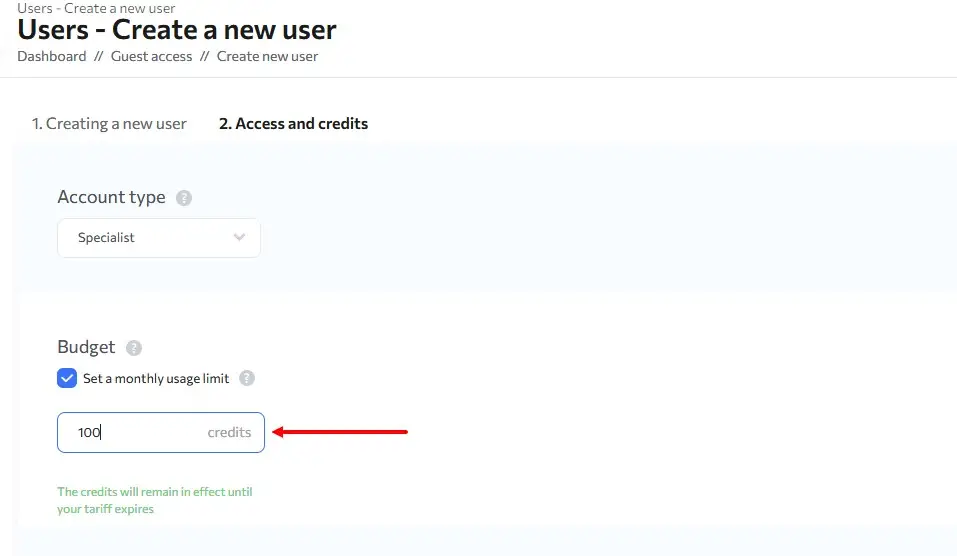
On the second step, you need to select the account type for the user.
Guest – can view tasks and download reports but cannot create, edit or update tasks.
Specialist – can create, edit, and update tasks. The Specialist accounts you create will use your subscription credits for creating and updating tasks. If you run out of subscriptions or subscription credits, updating or creating tasks on sub-accounts will be disabled.
Manager – automatically gives access to all tasks and all tools, as well as the user with this role can see the tasks of other subaccounts.
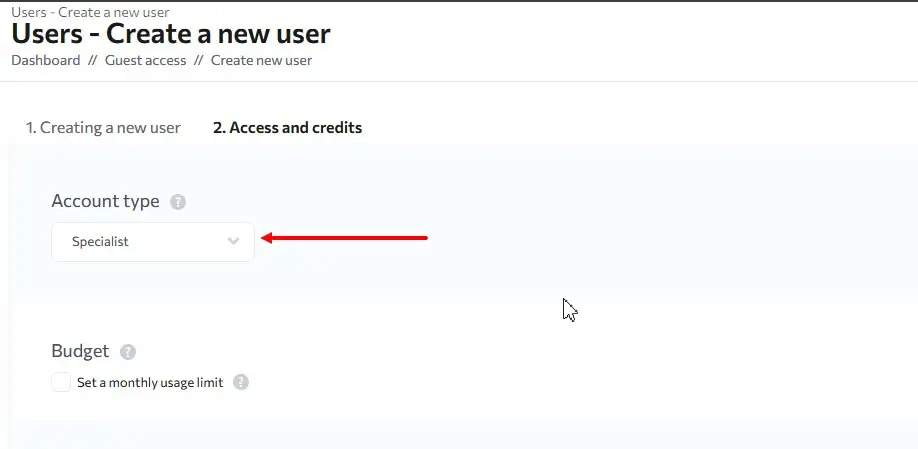
For the “Specialist” account type, you can select a limit on the number of credits available to the user. The user will not be able to spend more credits than the number of credits you have specified. All the credits they spend will be charged from your balance. If you do not set a credit limit, all credits available on your subscription will be available to the user.
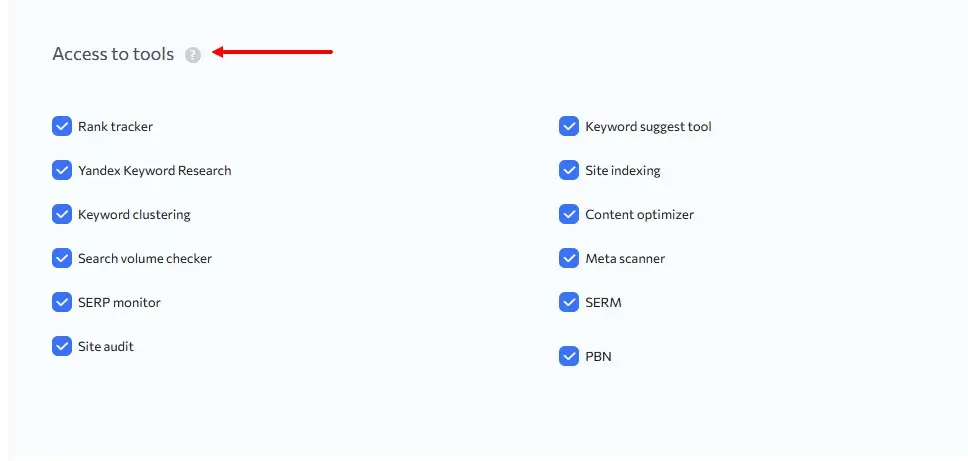
Access to tools
This option allows you to grant access to tools. Check the boxes of the tools you want to grant access to, and the user you created will be able to use these tools.
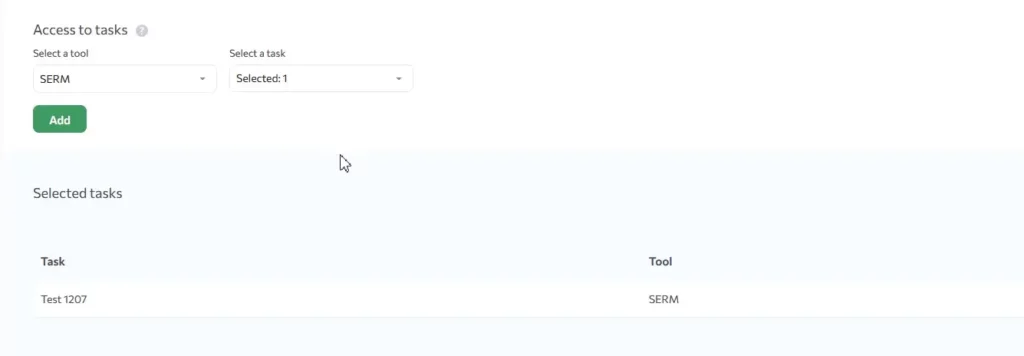
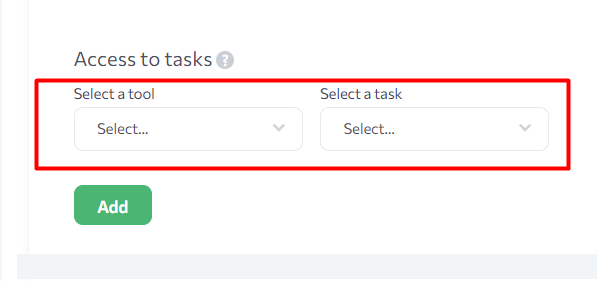
Access to tasks
This option allows you to give the user access to tasks already created. Select the tool and the task and press “Add” to grant access.
For “Guest” users, you must grant access to at least 1 task.
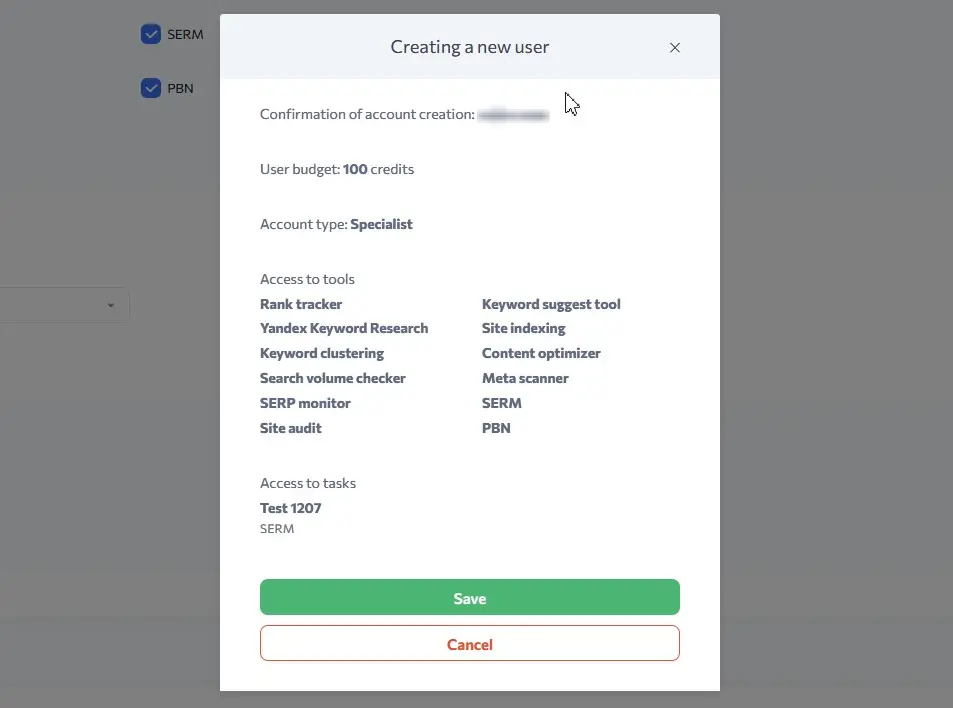
After you have filled in all the fields, click on the “Save access” button. A pop-up window will open with the information about the created account. You can then click on the “Save” button and the user will be created.
To get access automatically to all tasks and to all tools you need, at the stage of distributing accesses, to select the role “Manager”, tick the required tools and click “Save access” without selecting anything here :
View tasks created by users
Tasks created by users can be seen on the tool task listings by clicking on the “Show Shared” button:

Editing users
You can edit users’ details:
First name
Last name
Phone
Password
Type of account
Credit limit
Tool access
Access to tasks
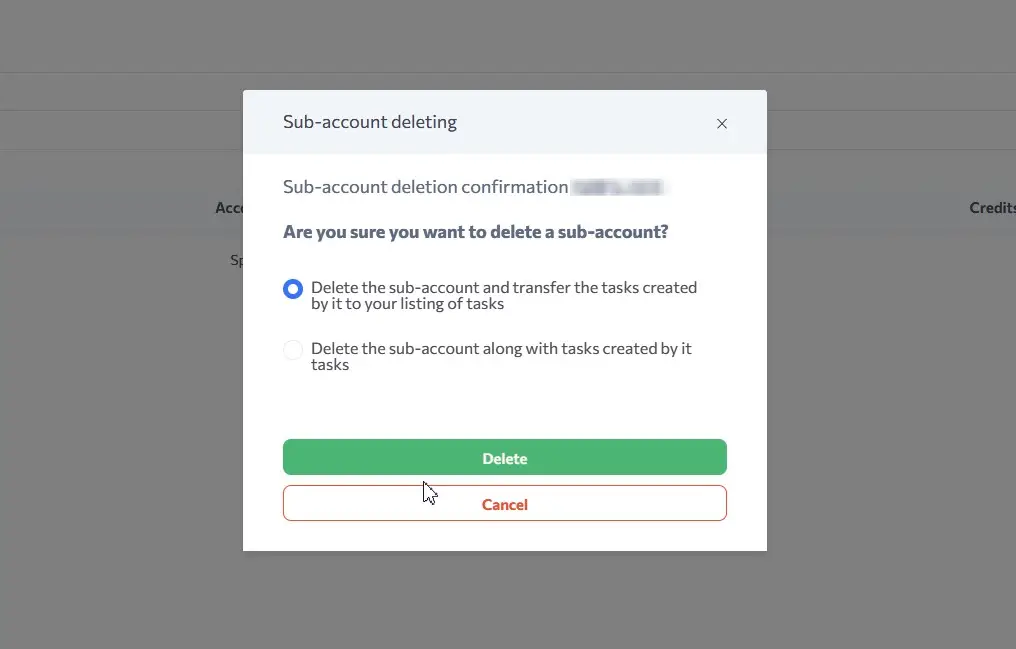
You can also delete a user and their tasks, or delete them and transfer all their tasks to your account. You can do this by selecting one of the two options when deleting a user:
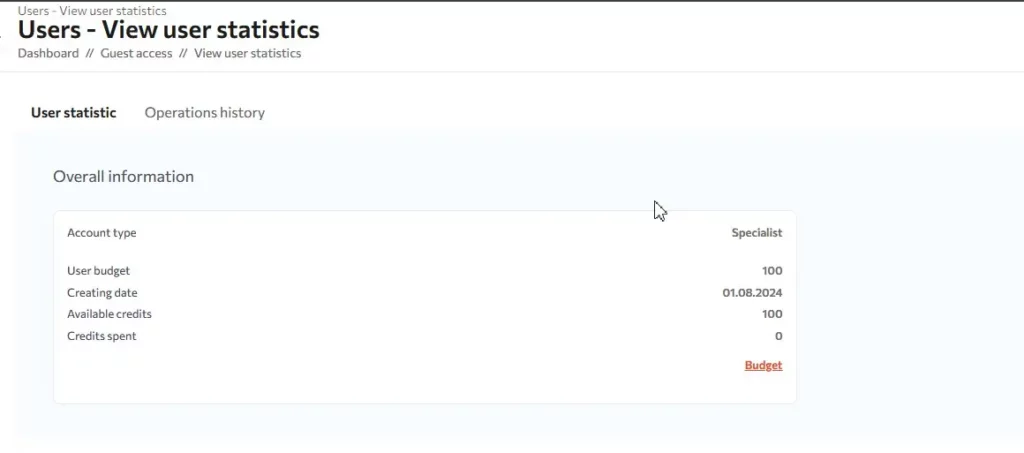
User statistics
User statistics tab
To view user statistics, you need to click on their name in the user listing.
In the user statistics, you can see the account type, user budget, creation date, available credits and credits spent.
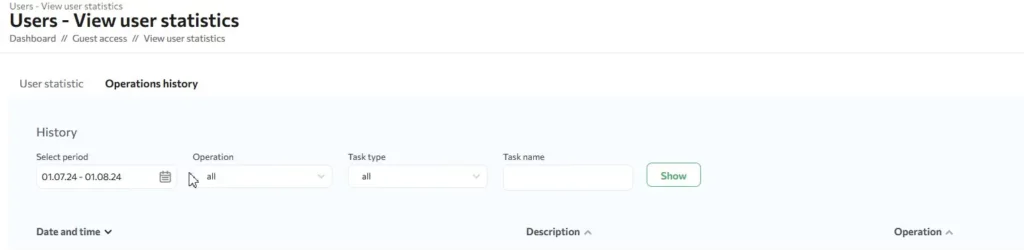
Events history tab
This tab contains the user’s event history and the cost of each event in credits.
Is this article helpful?
 146
146
 0
0